
Minolta XG-1 User Manual: A Comprehensive Guide
This detailed manual, sourced from manualsbase, offers extensive guidance on the Minolta XG-1 film camera, a classic within the Minolta MD mount system.
The Minolta XG-1, released in 1979, represents a pivotal point in 35mm SLR camera design, blending accessibility with professional-grade features. This camera, part of the broader XG series, quickly gained popularity amongst both amateur and experienced photographers. It’s celebrated for its robust build quality, reliable performance, and user-friendly operation.
This user manual aims to provide a comprehensive understanding of the XG-1, covering everything from basic operation to advanced techniques. Whether you’re a newcomer to film photography or a seasoned enthusiast, this guide will help you unlock the full potential of your Minolta XG-1. Resources like manualsbase.com offer valuable insights into this classic camera.
Historical Context of the XG Series
The Minolta XG series, launched in 1979, filled a crucial gap in Minolta’s lineup – a more affordable and accessible range of SLRs without sacrificing core photographic principles. Preceding the more professional XD and X-700 models, the XG series (including the XG-1, XG-2, and XG-7) aimed to attract a wider audience to the Minolta system.
These cameras represented a shift towards electronic control, featuring TTL metering and often, electronically controlled shutters. The XG-1, being the initial model, established the series’ reputation for reliability and ease of use. Resources like manualsbase.com highlight the XG series’ importance as a stepping stone in Minolta’s evolution, bridging the gap between fully mechanical and fully electronic cameras.
Key Features and Specifications
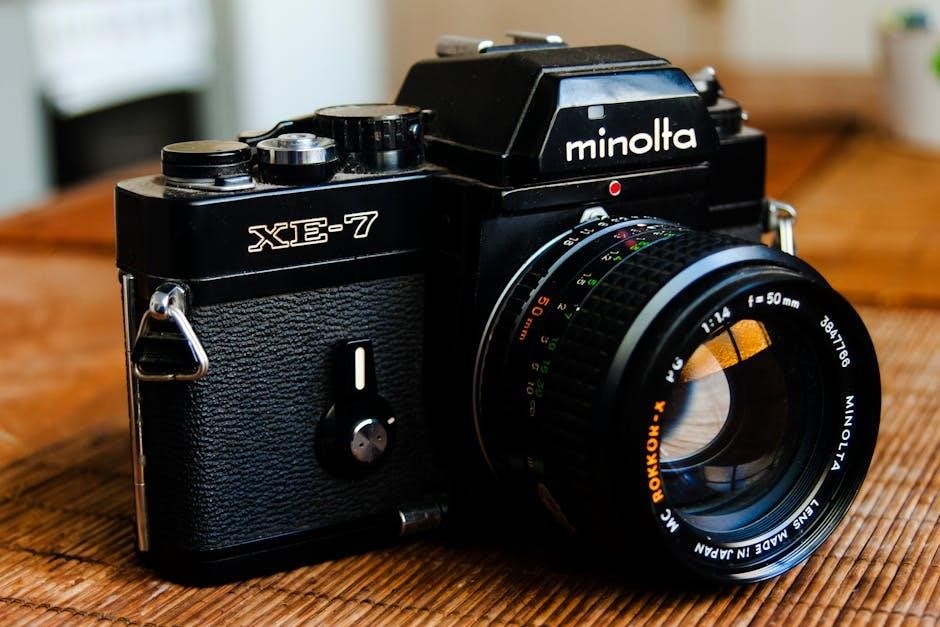
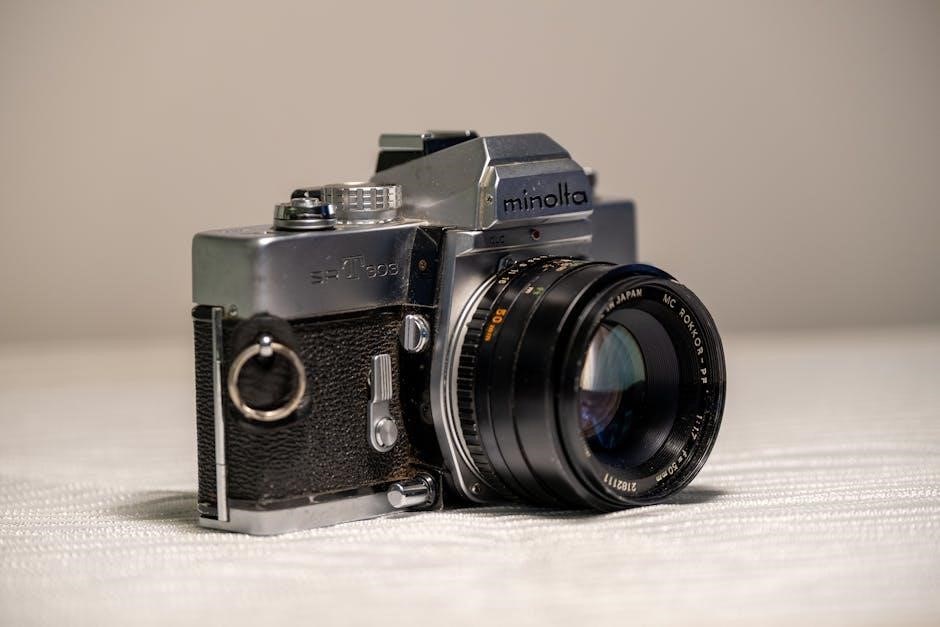
The Minolta XG-1 is a 35mm SLR boasting a horizontally-traveling cloth focal-plane shutter, offering speeds from 2 seconds to 1/1000th of a second, plus Bulb mode. It utilizes a TTL (Through-The-Lens) metering system for accurate exposure readings. The camera accepts Minolta MD-mount lenses, providing access to a wide range of high-quality optics.
Key features include manual aperture control, a self-timer, and hot shoe compatibility for external flash units. According to resources like manualsbase, the XG-1’s compact size and user-friendly design made it popular. It requires a PX28 battery for metering operation, and weighs approximately 560g without a lens. Its robust build and reliable mechanics contribute to its enduring appeal.

Understanding the Camera Body
Exploring the Minolta XG-1’s physical layout reveals intuitive controls and a thoughtfully designed body, enhancing the photographic experience for all users.
Front View: Lenses and Controls
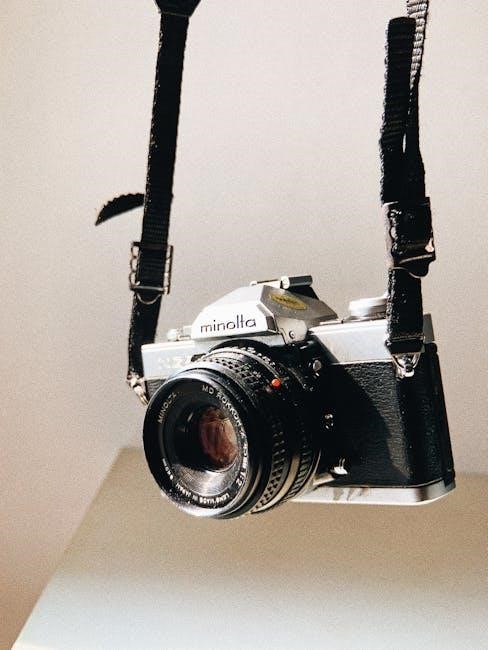
The Minolta XG-1’s front panel is dominated by the Minolta MD lens mount, accepting a wide array of compatible lenses. This bayonet mount ensures secure and precise lens attachment. To the right of the lens, you’ll find the aperture control ring, directly on the lens itself, allowing for adjustments to depth of field.
Below the lens mount resides the lens release button, crucial for swiftly detaching lenses when changing between focal lengths or types. The self-timer indicator light is also visible on the front, providing a visual cue during self-portrait or group shots. The overall design prioritizes accessibility and ease of use, allowing photographers to quickly adjust settings without disrupting their composition. Careful examination reveals a streamlined interface focused on core photographic functions.
Top View: Shutter Speed Dial and Film Advance
The XG-1’s top plate houses the essential controls for exposure and film handling. Prominently featured is the shutter speed dial, offering a range typically from 1 second to 1/1000th of a second, plus Bulb (B) mode for long exposures. Adjacent to this is the film advance lever, used to both cock the shutter and advance the film. A frame counter displays the number of exposures taken, aiding in tracking film usage.
The rewind crank is also located on top, used to rewind the film back into its cassette after shooting. The hot shoe for attaching an external flash is centrally positioned. These controls are ergonomically arranged for intuitive operation, allowing photographers to quickly adjust settings and advance film with minimal effort, contributing to a smooth shooting experience.
Back View: Film Compartment and Viewfinder
The rear of the Minolta XG-1 is dominated by the film compartment door, which opens to reveal the space for a 35mm film cassette. This door features a secure latch to prevent accidental opening during operation. Above the film compartment resides the optical viewfinder, offering a clear view of the scene. Within the viewfinder, you’ll find focusing aids and exposure information projected by the camera’s TTL metering system.
A diopter adjustment dial is typically present near the viewfinder to accommodate users with varying eyesight. The back also includes controls related to film rewinding and potentially a film reset button. The overall design prioritizes ease of film loading and a comfortable viewing experience for precise composition and focusing.
Bottom View: Battery Compartment and Tripod Socket
The underside of the Minolta XG-1 houses essential components for power and stability. A securely covered battery compartment is located here, typically accepting a small, commonly available battery type to power the camera’s light meter and potentially the self-timer. Correct battery installation is crucial for accurate exposure readings.
Centrally positioned is a standard tripod socket, allowing for stable long-exposure photography and minimizing camera shake. The socket’s placement ensures balanced mounting on a tripod. The bottom plate may also feature markings indicating the camera’s model and serial number for identification purposes. Careful handling of this area is important to avoid damage to the battery compartment or tripod mount.

Loading and Unloading Film
This section details the process of correctly inserting and removing film from the Minolta XG-1, ensuring proper operation and preserving your valuable images.
Film Types Compatible with the XG-1
The Minolta XG-1 is remarkably versatile when it comes to film choices, accommodating a wide range of options for photographers seeking diverse aesthetic results. Primarily designed for standard 35mm film, it functions optimally with black and white negative film, color negative film, and color slide (transparency) film.
ISO sensitivity, ranging from 25 to 3200, is readily supported, allowing for shooting in various lighting conditions. While modern films are generally recommended, the XG-1 can also handle older film stocks, though results may vary. Experimentation is encouraged! Avoid using films with excessively thick bases, as these may cause loading or winding issues. Always ensure the film is properly loaded to prevent light leaks and ensure accurate exposures.
Step-by-Step Film Loading Procedure
Begin by opening the film compartment door on the camera’s back. Insert the film canister into the left-side chamber, ensuring it clicks into place. Gently pull the film leader across the camera body to the take-up spool on the right. Carefully thread the film leader into a slot in the take-up spool, and advance the film using the film advance lever.
Continue advancing the film, watching for the rewind knob to rotate, confirming the film is properly engaged. Close the film compartment door. The XG-1 automatically resets the frame counter to ‘S’ and advances the film to frame ‘1’ with each lever stroke. Always test by advancing and releasing the shutter a couple of times before beginning your shooting session.
Rewinding the Film Correctly
To rewind the film, locate the rewind release button on the bottom of the camera and press it inwards. Lift the rewind crank and turn it in the direction indicated by the arrow. As you rewind, you’ll feel resistance initially, which will lessen as the film fully retracts into the canister.
Continue rewinding until you feel almost no resistance and the film leader is completely inside the canister. Once fully rewound, open the film compartment door and remove the film canister. Proper rewinding prevents damage to the film and ensures your images are safely stored. Avoid forcing the rewind crank, as this could potentially damage the mechanism.

Exposure Settings and Operation
Mastering exposure involves understanding shutter speed, aperture, and the XG-1’s TTL metering system for optimal image results and creative control.
Shutter Speed Control Explained
The Minolta XG-1’s shutter speed dial is a crucial component for controlling the duration of light exposure on the film. Located on the top plate, it allows photographers to select speeds ranging from 1 second to 1/1000th of a second, plus Bulb (B) mode for extended exposures.
Understanding shutter speed is fundamental to photography. Faster shutter speeds – like 1/500th or 1/1000th – freeze motion, ideal for sports or wildlife. Slower speeds – such as 1/30th or 1 second – allow more light in, useful in low-light conditions, but can introduce motion blur. The dial features a lock to prevent accidental changes. Correct shutter speed selection, combined with aperture control, is key to achieving properly exposed photographs.
Aperture Control and Depth of Field
Aperture, controlled by the lens itself (not the camera body on the XG-1), dictates the size of the lens opening. This directly impacts both the amount of light reaching the film and the depth of field – the area in your image that appears acceptably sharp.
Larger apertures (smaller f-numbers like f/1.4 or f/2.8) let in more light, creating a shallow depth of field, ideal for isolating subjects with blurred backgrounds. Smaller apertures (larger f-numbers like f/16 or f/22) let in less light but increase depth of field, keeping more of the scene in focus. Mastering aperture control is essential for creative image making and achieving the desired aesthetic.
Metering System: TTL Metering Explained
The Minolta XG-1 utilizes a Through-The-Lens (TTL) metering system, a significant advancement for its time. This means the camera measures light after it passes through the lens, providing a more accurate exposure reading than earlier systems. The TTL meter reads the reflected light directly off the film plane, accounting for the lens’s characteristics.
The camera displays exposure information within the viewfinder, indicating whether the scene is underexposed, correctly exposed, or overexposed. Adjust shutter speed and aperture until the meter indicates correct exposure. Understanding TTL metering is crucial for consistently achieving well-exposed photographs with the XG-1, especially in varying lighting conditions.
Using the Exposure Compensation Dial
The Exposure Compensation dial on the Minolta XG-1 allows you to override the camera’s TTL metering system, crucial for challenging lighting scenarios. Use it when the meter is fooled by unusually bright or dark subjects. For example, photographing a snowy scene requires positive compensation (+1 or +2 stops) to prevent underexposure.
Conversely, a very dark subject against a bright background needs negative compensation (-1 or -2 stops) to avoid overexposure. The dial is typically marked in stops (+/- 2 stops). Remember to return the dial to the ‘0’ position after taking the compensated shot to ensure accurate metering for subsequent images. Practice is key to mastering exposure compensation!
Focusing and Viewfinder Information
Achieving sharp images with the XG-1 relies on mastering manual focusing techniques, utilizing the clear viewfinder display and its helpful split-image focusing aid.
Focusing Methods: Manual Focus
The Minolta XG-1 operates exclusively with manual focus, demanding a direct and engaged approach to achieving sharp images. Unlike modern autofocus systems, you, the photographer, are entirely responsible for adjusting the lens until the subject appears crisp within the viewfinder. This process fosters a deeper understanding of depth of field and critical focus.
Rotate the focusing ring on the lens barrel – typically a ridged section – while observing your subject through the viewfinder. Pay close attention to the split-image focusing aid (detailed in the next section) to pinpoint precise focus. Slight adjustments are often necessary, especially at wider apertures where depth of field is shallow. Practice is key to developing a feel for accurate manual focusing with the XG-1, allowing for creative control and consistently sharp results;
Understanding the Viewfinder Display
The XG-1’s viewfinder provides crucial information for accurate exposure and focusing. Central to the display is the focusing spot, often a split-image or microprism collar, aiding manual focus confirmation. Surrounding this are indicators for the TTL metering system. These indicators illuminate to show under, correct, or overexposure, guiding aperture and shutter speed adjustments.
You’ll also find an LED indicator confirming battery status and whether the meter is active. Some models display a small LED to indicate if exposure compensation is engaged. Familiarize yourself with these elements; they are essential for mastering the XG-1. Correctly interpreting the viewfinder display is paramount to achieving well-exposed and sharply focused photographs.
Split-Image Focusing Aid
The Minolta XG-1 utilizes a split-image focusing aid within the viewfinder, a clever system for achieving precise manual focus. This aid presents a circular area in the center of the viewfinder, divided into two contrasting sections. When the subject is out of focus, these sections appear misaligned;
As you rotate the focusing ring on the lens, the two sections gradually move towards alignment. When perfectly aligned, the subject is in sharpest focus. This method is incredibly effective, even in low light. Mastering the split-image requires practice, but it quickly becomes intuitive, allowing for consistently accurate focusing and beautifully sharp images with your XG-1.
Advanced Features and Functions
Explore the XG-1’s capabilities beyond basic operation, including Bulb mode for long exposures, a convenient self-timer, and creative multiple exposure techniques.
B (Bulb) Mode Operation
The Minolta XG-1’s Bulb (B) mode allows for exposures exceeding the camera’s maximum shutter speed, offering significant creative control, particularly in low-light scenarios or for light painting. To engage Bulb mode, the shutter speed dial must be rotated past the marked ‘B’ setting.
When in Bulb mode, the shutter remains open as long as the shutter release button is depressed. A remote cable release is highly recommended to prevent camera shake during extended exposures. Remember to carefully meter the scene and calculate the appropriate exposure time, as the camera provides no automatic assistance in this mode.
Experimentation is key! Bulb mode is ideal for capturing star trails, creating light streaks from moving vehicles, or achieving artistic blur effects. Always ensure the camera is stable on a tripod when utilizing Bulb mode for optimal results and sharp images.
Self-Timer Functionality
The Minolta XG-1 incorporates a convenient self-timer function, enabling you to participate in your own photographs or avoid camera shake during long exposures. Activation is straightforward: locate the self-timer lever, typically positioned near the shutter release button, and move it to the ‘S’ or self-timer position.
Once engaged, a short delay – approximately 10 seconds – will commence before the shutter is released. A small indicator light will illuminate during this countdown. Ensure you are fully within the frame and composed before activating the self-timer.
To cancel the self-timer, simply return the lever to its original position. This feature is particularly useful for group portraits or when precise timing is required. Remember to use a stable surface or tripod for the best results, even with the self-timer engaged.
Multiple Exposure Techniques
The Minolta XG-1 allows for creative multiple exposures, layering two or more images onto a single frame of film. To achieve this, you must first engage the multiple exposure mode, usually by utilizing a dedicated lever or setting within the film advance mechanism. This prevents the camera from automatically advancing the film after each shot.
After activation, take your first photograph. Then, without advancing the film, compose and take your second exposure directly onto the same frame. Repeat this process as desired, carefully considering the cumulative effect of each exposure.
Remember to disengage the multiple exposure mode once finished to ensure normal film advancement. Experiment with different combinations and exposure settings to create unique and artistic effects. Careful metering is crucial to avoid overexposure.
Maintenance and Troubleshooting
Regular cleaning, proper battery replacement, and addressing common issues will ensure your Minolta XG-1 remains in optimal working condition for years of enjoyment.
Cleaning the Camera Body and Lens
Maintaining the cleanliness of your Minolta XG-1 is crucial for its longevity and optimal performance. For the camera body, use a soft, dry microfiber cloth to gently wipe away dust and fingerprints. Avoid using harsh chemicals or solvents, as these can damage the finish. For stubborn grime, lightly dampen the cloth with distilled water, ensuring it’s not dripping wet.
Lens cleaning requires extra care. Begin by using a blower brush to remove loose dust particles. Then, apply a few drops of lens cleaning solution to a clean lens cloth (specifically designed for optics) and gently wipe the lens surface in a circular motion, starting from the center and moving outwards. Avoid applying excessive pressure. Regularly cleaning both the body and lens will help preserve image quality and prevent potential mechanical issues.
Battery Replacement and Type
The Minolta XG-1 utilizes a PX28 or equivalent 4LR44/4SR44 battery to power its light meter. Battery life varies depending on usage, but it’s advisable to replace it when the battery warning light illuminates in the viewfinder. To access the battery compartment, locate it on the bottom of the camera body.
Use a small screwdriver to open the compartment cover. Carefully remove the old battery and insert the new one, ensuring correct polarity (+ and ⎯ terminals align). Close the compartment securely. Avoid mixing old and new batteries. Regularly checking the battery ensures accurate exposure readings. If the camera will be stored for an extended period, remove the battery to prevent potential corrosion or leakage.
Common Problems and Solutions
If the XG-1’s shutter doesn’t fire, first check the battery. A weak battery is a frequent culprit. Also, ensure the film is loaded correctly and the shutter speed dial isn’t set to ‘B’ (Bulb) unintentionally. If the meter appears inaccurate, verify the battery and consider resetting it by removing and reinserting.
Sticky shutter curtains can occur with infrequent use; professional cleaning is recommended. A dim viewfinder might indicate a need for cleaning the focusing screen. If film advance is difficult, check for obstructions or debris within the film chamber. Always consult a qualified technician for complex repairs. Avoid attempting self-repairs if you lack experience.
Lens Compatibility and Usage
The Minolta XG-1 utilizes the Minolta MD mount, offering compatibility with a wide range of Minolta MD lenses for versatile photographic expression.
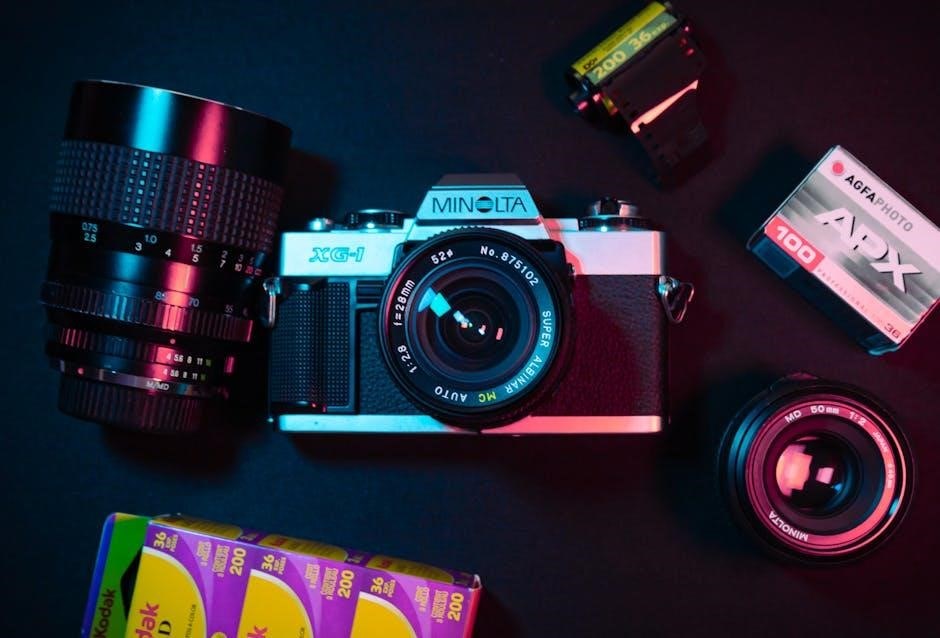
Minolta MD Mount Lenses
The Minolta XG-1 camera is specifically designed to work with lenses featuring the Minolta MD mount. This mount system provides a robust and reliable connection, ensuring optimal optical performance and mechanical precision. A vast selection of MD lenses were produced, encompassing a diverse range of focal lengths – from ultra-wide angles ideal for landscapes to powerful telephotos suited for wildlife photography.
These lenses are known for their excellent build quality and sharp image rendition. Many MD lenses feature manual aperture control rings and focusing mechanisms, allowing for precise creative control. The MD mount also supports features like aperture priority mode when used with compatible lenses, enhancing the shooting experience. Exploring the used market reveals numerous affordable and high-quality Minolta MD lenses, making them an excellent choice for XG-1 users.
Adapting Other Lens Mounts
While the Minolta XG-1 excels with native Minolta MD mount lenses, adapters allow for the use of lenses from other manufacturers and mount systems. Adapters are readily available for mounts like Canon FD, Olympus OM, and Pentax K, expanding your creative options significantly. However, it’s crucial to understand that using adapters may introduce limitations.
Specifically, autofocus functionality will generally be lost when adapting lenses, as the XG-1 is a manual focus camera. Stop-down metering is often required, meaning the lens aperture must be set before metering, potentially affecting viewfinder brightness. Adapter quality varies; investing in a well-made adapter ensures a secure fit and minimizes potential light leaks. Research compatibility and potential drawbacks before purchasing an adapter for your Minolta XG-1.
Recommended Lenses for the XG-1
The Minolta XG-1 truly shines when paired with high-quality Minolta MD mount lenses. A versatile starting point is the Minolta MD 50mm f/1.7 – a sharp, fast prime ideal for various shooting scenarios. For wider perspectives, consider the Minolta MD 28mm f/2.8, excellent for landscapes and street photography. Telephoto options include the Minolta MD 135mm f/2.8, perfect for portraits with beautiful bokeh.
Beyond these, explore the MD zoom range, like the 35-70mm or 75-150mm, offering flexibility. Don’t overlook older, manual focus Rokkor lenses; they often deliver exceptional image quality at affordable prices. Prioritize lenses in good condition with clean optics for optimal results with your XG-1.