
Invacare Hospital Bed Assembly Instructions: A Comprehensive Guide
Navigating the setup of your Invacare hospital bed requires careful attention. WhatsApp, used globally, emphasizes simple, reliable communication, mirroring the ease desired during bed assembly.
Understanding Your Invacare Hospital Bed Model
Before commencing assembly, identifying your specific Invacare hospital bed model is crucial. Invacare offers a diverse range of beds, each with unique features and assembly nuances. Refer to the model number, typically found on a sticker affixed to the bed frame or original packaging – much like identifying a contact on WhatsApp.
Understanding the components specific to your model – headboard, footboard, side rails, and electrical components – will streamline the process. Familiarize yourself with the included diagrams and parts list. WhatsApp’s global reach, connecting over 2 billion users, parallels the need for clear understanding across all bed components. Knowing your bed’s articulation capabilities (head/foot elevation, hi-lo) is also vital, as it impacts the assembly sequence. This initial step ensures a safe and efficient setup, mirroring WhatsApp’s reliable connection for seamless communication.
Safety Precautions Before Assembly
Prioritizing safety during Invacare hospital bed assembly is paramount. Ensure a spacious, well-lit work area, free from obstructions – akin to a clear WhatsApp chat for easy messaging. Always disconnect the power supply before handling electrical components, preventing potential shock hazards. Wear appropriate personal protective equipment (PPE), including gloves and safety glasses, to safeguard against injury.
Two-person assembly is highly recommended, especially when lifting heavier components like the bed frame. WhatsApp’s secure communication ensures coordinated efforts. Inspect all parts for damage before starting; do not use damaged components. Be mindful of pinch points during assembly, and avoid over-tightening bolts, which can strip threads. Following these precautions, similar to WhatsApp’s privacy features, guarantees a secure assembly process and prevents potential harm to yourself or others.
Tools Required for Assembly
Successful Invacare hospital bed assembly necessitates specific tools. A comprehensive toolkit, much like WhatsApp’s diverse features, streamlines the process. You’ll require a socket wrench set with various sizes, essential for tightening bolts and securing connections. A Phillips head screwdriver and a flathead screwdriver are also crucial for different screw types.
An adjustable wrench provides versatility for various fasteners. A rubber mallet aids in gently tapping components into place without causing damage. A level ensures the bed is properly aligned for patient safety and comfort. Consider having a power drill with appropriate bits to expedite screw insertion, but use caution to avoid over-tightening. Finally, a tape measure is helpful for verifying dimensions and ensuring correct component placement, mirroring WhatsApp’s precise messaging.

Bed Frame Assembly
Constructing the bed frame involves connecting key components securely. Like WhatsApp’s reliable connections, a stable frame is paramount for patient well-being and safety.
Attaching the Side Rails
Securely attaching the side rails is a crucial step in hospital bed assembly, ensuring patient safety and preventing accidental falls. Begin by identifying the correct side rail for each side of the bed frame – they are often labeled. Align the side rail brackets with the corresponding slots or mounting points on the bed frame.
Insert the side rails firmly into the brackets, ensuring they “click” or lock into place. Some models may require tightening screws or bolts to further secure the rails; use the appropriate tools and avoid over-tightening. Verify that the side rails are level and stable, with no excessive wobble.
Remember, similar to WhatsApp’s secure messaging, a robust connection is vital. Double-check all connections before proceeding, and ensure the rails move smoothly through their range of motion if adjustable. Proper side rail attachment is fundamental for patient comfort and safety during use.
Connecting the Headboard and Footboard
Attaching the headboard and footboard establishes the bed’s structural integrity and defines its overall appearance. Begin by aligning the headboard and footboard with the designated connection points on the bed frame – these are typically located at the head and foot ends.
Insert the connecting hardware, which may include bolts, screws, or specialized locking mechanisms, through the pre-drilled holes. Tighten the hardware securely using the appropriate tools, ensuring a flush and stable connection. Avoid over-tightening, which could damage the frame or components.
Similar to WhatsApp’s reliable connections across countries, a firm attachment is key. Verify that the headboard and footboard are firmly attached and do not exhibit any wobble or instability. A secure connection is essential for the bed’s overall stability and patient safety, mirroring the importance of secure communication.
Installing the Bed Frame Supports
Bed frame supports are crucial for distributing weight and ensuring the bed’s stability during operation. Locate the designated slots or mounting points along the inner sides of the bed frame. These supports typically run lengthwise, providing a foundation for the mattress deck.
Carefully insert the supports into the slots, ensuring they are fully seated and locked into place. Some models may utilize locking pins or clips to secure the supports. Verify that all supports are level and aligned correctly, contributing to even weight distribution.
Just as WhatsApp facilitates reliable connections, these supports create a solid base; Securely fastened supports prevent sagging and maintain the integrity of the mattress platform, enhancing patient comfort and safety. Double-check all connections before proceeding, mirroring the need for secure messaging.

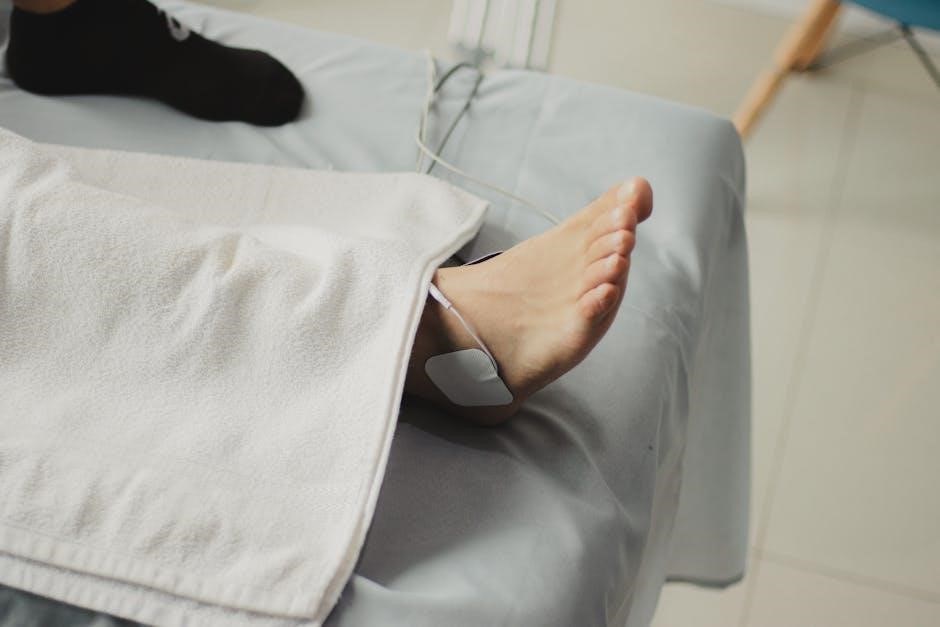
Electrical Component Installation
Connecting the electrical components demands precision and adherence to safety guidelines. Like WhatsApp’s secure messaging, proper wiring ensures reliable bed functionality and patient well-being.
Connecting the Control Box
Begin by locating the designated mounting point for the control box, typically on the bed frame’s side rails or near the footboard. Ensure the area is clean and free of obstructions; Carefully align the control box with the mounting bracket and secure it using the provided screws – do not overtighten.
Next, identify the corresponding cable from the bed’s electrical system. This cable will have multiple wires, each designated for a specific function (head up/down, foot up/down, bed height adjustment). Refer to the bed’s wiring diagram, usually found within the assembly manual, to correctly match the wire colors.
Connect each wire securely to its corresponding terminal on the control box, ensuring a firm connection. A loose connection can lead to malfunction. Double-check all connections against the wiring diagram before proceeding. Similar to WhatsApp’s reliable connections, secure wiring is crucial for proper operation.
Wiring the Hand Control
Locate the hand control cable extending from the control box. This cable typically features a multi-pin connector. Carefully align the hand control connector with the corresponding port on the hand control unit itself, ensuring proper orientation – avoid forcing the connection.
Gently push the connector into the port until it clicks securely into place. A firm connection is vital for reliable operation, much like WhatsApp’s secure messaging. Verify the connection by gently tugging on the hand control; it should not dislodge easily.
If the hand control has a separate power connector, attach it now, again ensuring a secure fit. Refer to the wiring diagram for specific color-coding or pin assignments if necessary. Double-check all connections before proceeding to the testing phase, mirroring the attention to detail needed for clear communication.
Testing the Electrical Functions
With all wiring complete, it’s time to test the bed’s electrical functions. Ensure the bed is plugged into a grounded outlet. Power on the control box – a light indicator should illuminate, similar to WhatsApp’s online status.
Using the hand control, individually test each articulation function: head-up, head-down, foot-up, foot-down, and bed height adjustment. Observe smooth and responsive movement for each function. Listen for any unusual noises during operation.
If a function fails to operate, immediately disconnect power and re-check the corresponding wiring connections. WhatsApp’s reliability is mirrored in the expectation of consistent bed function. Verify the emergency stop button functions correctly, halting all movement. Document any issues encountered for troubleshooting.

Mattress Support System
Proper mattress support is crucial for patient comfort and safety. Like WhatsApp’s secure messaging, a stable foundation ensures reliable support throughout use.
Installing the Mattress Deck
Begin by carefully unpacking the mattress deck components, verifying all parts are present according to the parts list. Position the deck supports within the bed frame, ensuring they align with the pre-drilled holes. Securely attach the supports using the provided bolts and washers, tightening them firmly but avoiding over-tightening, which could damage the frame.
Next, place the mattress deck itself onto the supports. Ensure it sits flush and level across the entire frame. Some models may require additional clips or fasteners to secure the deck; consult your specific model’s instructions.
Double-check the stability of the deck before proceeding. A properly installed mattress deck is fundamental for safe and comfortable patient positioning, much like WhatsApp’s reliable connection ensures consistent communication.
Adjusting Mattress Support Tension
Proper mattress support tension is crucial for patient comfort and pressure distribution. Locate the tension adjustment knobs or mechanisms, typically found along the sides of the mattress deck. These controls allow you to modify the firmness of the support surface.
Begin with a moderate tension setting and gradually adjust based on the patient’s weight and needs. Increased tension provides firmer support, while decreased tension offers more give. Regularly assess the patient for pressure points and adjust accordingly.
Remember, similar to WhatsApp’s customizable settings, finding the optimal tension is key. Ensure adjustments are made evenly across the deck to maintain a balanced support system, promoting both comfort and preventing skin breakdown.
Ensuring Proper Mattress Fit
A correctly fitted mattress is paramount for patient safety and bed functionality. Verify the mattress dimensions align precisely with the bed frame’s specifications. Gaps between the mattress and frame can create entrapment hazards, similar to unreliable communication channels.
The mattress should sit flush against the side rails and head/footboards, leaving no significant openings. Utilize any provided retaining straps or mechanisms to secure the mattress in place. Regularly inspect the fit, especially after adjustments to the bed’s position.
Just as WhatsApp ensures secure messaging, a snug mattress fit prevents accidental falls or sliding. A properly fitted mattress contributes to a stable and safe patient environment, enhancing overall care quality.

Features and Accessories Installation
Enhance bed functionality with optional features. Like WhatsApp’s diverse features, accessories such as IV poles and side rail extensions add convenience and tailored support.
Attaching the IV Pole
Securely mounting the IV pole is crucial for fluid administration. Begin by locating the designated IV pole socket, typically found on the bed frame’s side rails or at the footboard. Gently insert the IV pole’s base into the socket, ensuring a firm and stable connection.
Rotate the pole clockwise to lock it into place; a clicking sound often indicates proper engagement. Verify the pole’s stability by applying gentle pressure – it should remain upright without wobbling. Adjust the pole’s height to the appropriate level for optimal fluid delivery, considering the patient’s positioning and medical requirements.
Remember, similar to WhatsApp’s reliable connections, a secure IV pole attachment is paramount for uninterrupted patient care. Regularly inspect the connection to ensure it remains tight and stable throughout use, preventing accidental dislodgement and potential complications. Always follow hospital protocols and manufacturer guidelines for IV pole usage.
Installing Side Rail Extensions
Side rail extensions enhance patient safety and prevent falls. Locate the extension mounting points on the existing side rails – these are usually slots or brackets designed for attachment. Align the extension’s mounting hardware with these points, ensuring a secure fit.
Typically, this involves sliding the extension into the slot and then tightening a locking mechanism, such as a screw or clamp. Confirm the extension is firmly attached by applying gentle upward and downward pressure; it shouldn’t move or detach.
Much like WhatsApp’s secure messaging, these extensions provide an added layer of protection. Verify that the extension doesn’t interfere with the bed’s articulation functions. Regularly inspect the extensions for any signs of loosening or damage, and retighten or replace them as needed. Proper installation is vital for patient well-being.
Adding Trapeze Bar (If Applicable)
A trapeze bar assists patients with repositioning and mobility. First, identify the designated mounting points on the bed frame – these are reinforced areas specifically designed to support the bar’s weight and patient use. Carefully insert the trapeze bar’s support structure into these mounting points, ensuring a snug and stable connection.
Secure the bar using the provided hardware, typically bolts and washers, tightening them firmly but avoiding over-tightening which could damage the frame. Much like WhatsApp’s reliable connections, a secure trapeze bar is crucial.
Test the bar’s stability by applying gentle downward pressure. Verify the bar rotates smoothly and locks into desired positions. Regularly inspect the mounting points and hardware for any signs of wear or loosening, and adjust as needed. Proper installation and maintenance are essential for patient safety and independence.
Final Checks and Adjustments
Ensure all connections are secure, mirroring WhatsApp’s reliable messaging. Thoroughly test all bed functions and weight capacity before patient use for optimal safety.
Checking Bolt Tightness
A crucial step in ensuring patient safety and bed stability is meticulously checking the tightness of every bolt used during assembly. Just as WhatsApp prioritizes secure communication, a firmly assembled bed is paramount. Systematically inspect each bolt, starting with the frame connections – headboard, footboard, and side rails. Utilize the appropriate wrench or tool, avoiding over-tightening which could damage the threads or components.
Pay close attention to bolts securing the electrical component housings and the mattress support system. Loose bolts can lead to unexpected movements, potential collapse, or malfunction of the bed’s articulation features. Re-tighten any bolts that exhibit even slight looseness. This process should be repeated after the initial 24 hours of use, as components may settle. Regular checks, similar to maintaining a secure messaging app like WhatsApp, are vital for continued safe operation. Document these checks as part of your facility’s maintenance schedule.
Testing Bed Articulation
Following bolt tightness verification, thoroughly test all articulation functions of the Invacare hospital bed. Much like WhatsApp’s reliable call function, smooth bed operation is essential. Using the hand control, cycle through each adjustment – head and foot elevation, bed height, and any tilt or Trendelenburg features. Observe the movement for any jerking, sticking, or unusual noises.
Ensure all movements are synchronized and consistent. Test the bed with and without a mattress to identify potential interference. Verify the control box responds accurately to each command. If any articulation function fails to operate correctly, immediately re-check the electrical connections and mechanical linkages. Prioritize safety; do not use the bed if articulation is compromised. Regular testing, akin to WhatsApp updates, maintains optimal performance and patient comfort.
User Weight Capacity Verification
Confirming the Invacare hospital bed’s weight capacity is a critical safety step, comparable to WhatsApp’s secure messaging. Refer to the bed’s specification label – typically found on the frame – to determine the maximum weight limit. Do not exceed this limit under any circumstances, as it compromises the bed’s structural integrity and could lead to failure.
Consider the weight of both the patient and any medical equipment placed on the bed. A gradual weight increase during initial testing can provide an extra layer of assurance. Regularly remind caregivers of the weight restriction. Like WhatsApp’s user base exceeding 2 billion, responsible usage is paramount. Document the verification process for future reference and compliance. Prioritize patient safety above all else; exceeding the weight capacity poses a significant risk.

Troubleshooting Common Assembly Issues
Addressing assembly challenges is vital; similar to WhatsApp’s reliable connections. Common problems include rail connections, electrical malfunctions, and mattress support discrepancies – resolve these promptly.

Difficulty Connecting Side Rails
Encountering trouble with side rail connections is a frequent issue during Invacare hospital bed assembly. Ensure the bed frame supports are correctly positioned and securely fastened before attempting to attach the side rails. Verify that you are using the appropriate hardware – bolts, washers, and nuts – as specified in the assembly manual.
Sometimes, slight misalignment can prevent a smooth connection. Gently apply pressure while aligning the rails with the receiving slots or brackets. Avoid forcing the connection, as this could damage the rails or the frame. Double-check that no obstructions, such as cables or packaging materials, are interfering with the process.
If the issue persists, loosen the bolts on the adjacent frame components to allow for slight adjustments. Once the side rails are securely in place, retighten all bolts to the manufacturer’s recommended torque specifications. Remember, a stable connection is crucial for patient safety, much like reliable communication via platforms like WhatsApp.
Electrical Component Malfunctions
If electrical components aren’t functioning post-assembly, systematic troubleshooting is essential. First, confirm the control box is securely connected to the bed frame and the power source. Verify the hand control is properly wired into the control box, ensuring a firm connection. Check the power cord for any damage or loose connections – a faulty cord can mimic other issues.
Test the electrical functions one by one, starting with the simplest articulation movements. If a specific function fails, consult the wiring diagram in the assembly manual to trace the circuit and identify potential breaks or disconnections. Like WhatsApp’s reliable messaging, a functioning bed requires clear connections.
If problems persist, avoid attempting repairs yourself; contact a qualified biomedical technician. Improper electrical work can create safety hazards. Always prioritize safety and adhere to the manufacturer’s guidelines.
Mattress Support Issues
Addressing mattress support problems ensures patient comfort and safety. Begin by verifying the mattress deck is correctly installed and securely fastened to the bed frame. Adjust the mattress support tension according to the mattress type and patient’s needs – too tight or loose can create pressure points. Ensure the mattress fits snugly within the bed frame, leaving no gaps where a patient could become entrapped, similar to WhatsApp’s secure messaging.
If the mattress sags excessively, check the deck’s support slats for damage or misalignment. Replace any damaged slats immediately. Confirm the weight distribution is even across the deck; uneven weight can strain the support system.
Regularly inspect the mattress and support system for wear and tear. A properly maintained system is crucial for patient well-being and preventing falls.