
Caterpillar to butterfly kits offer an engaging, educational experience, bringing the wonder of metamorphosis directly into your home for observation and learning.
These carefully curated kits provide everything needed to witness the incredible transformation from tiny larva to a beautiful, winged adult butterfly.
It’s a fantastic way to connect with nature and understand the fascinating stages of a butterfly’s life, suitable for all ages and educational settings.
What is a Caterpillar to Butterfly Kit?
Caterpillar to butterfly kits are self-contained ecosystems designed to facilitate the rearing of butterflies from their larval stage to adulthood, all within a controlled environment.
Typically, a kit includes a mesh habitat – a pop-up enclosure providing ventilation and visibility – alongside a supply of nutritious food specifically formulated for the included caterpillar species.
Most kits contain live caterpillars, often shipped in a secure container with their initial food source, ensuring their safe arrival.
These kits are designed to simplify the process of butterfly rearing, making it accessible even for beginners. They often include detailed instructions and educational materials explaining each stage of the butterfly life cycle.
The goal is to provide a complete and convenient package, allowing individuals and families to observe the remarkable metamorphosis firsthand, from egg to iconic butterfly.
Kits vary in complexity, some focusing on a single butterfly species, while others offer a broader experience with multiple species.
Benefits of Raising Butterflies
Raising butterflies through a caterpillar kit offers a wealth of educational and emotional benefits, fostering a deeper appreciation for the natural world and its intricate processes.
Observing the complete metamorphosis – from egg to larva, pupa, and finally, a winged adult – provides a tangible, hands-on learning experience, particularly valuable for children studying science and biology.
It cultivates patience and responsibility as caretakers learn to provide the necessary food and environment for the caterpillars’ healthy development.
Witnessing the transformation is inherently rewarding, instilling a sense of wonder and connection to nature’s beauty.
Furthermore, raising butterflies contributes to pollinator conservation efforts by increasing awareness of their importance and the challenges they face.
It’s a calming and engaging activity, offering a unique opportunity to disconnect from technology and reconnect with the natural rhythms of life, promoting mindfulness and well-being.
Understanding the Butterfly Life Cycle
Butterflies undergo complete metamorphosis, transforming through four distinct stages: egg, larva (caterpillar), pupa (chrysalis), and adult, each crucial for development.
Stage 1: The Egg
The butterfly life cycle begins with the egg stage, often delicately laid on a specific host plant chosen by the female butterfly. These eggs, frequently small and ranging in shape from round to oval, are barely visible to the naked eye – often resembling tiny pinheads.
The host plant is critically important as it will serve as the first food source for the emerging caterpillar. Different butterfly species lay their eggs on different plants, ensuring the larva has the appropriate nourishment.
Depending on environmental factors like temperature and the butterfly species, the incubation period varies, typically ranging from a few days to a couple of weeks. Within the egg, the initial development of the caterpillar takes place, preparing it for its emergence into the world. Observing these tiny eggs is the first step in witnessing nature’s incredible transformation.
Kits often include eggs already attached to a mesh or card, simplifying the initial observation process.
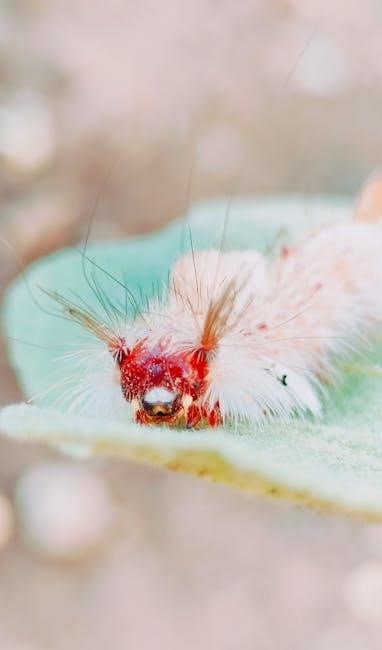
Stage 2: The Larva (Caterpillar)
The larval stage, commonly known as the caterpillar phase, is characterized by an intense focus on eating and growth. Upon hatching from the egg, the caterpillar’s primary function is to consume vast amounts of foliage, rapidly increasing in size. This stage is all about accumulating energy reserves for the transformative pupa stage ahead.
Caterpillars possess strong mandibles designed for chewing leaves, and they will feed continuously throughout the day. As they grow, their exoskeleton becomes restrictive, leading to a fascinating process called molting.
This stage is crucial for development, and observing the caterpillar’s feeding habits and growth is a key part of the kit experience. Providing a consistent supply of fresh host plant leaves is essential for a healthy caterpillar.
The caterpillar’s sole purpose is to eat, grow, and prepare for the next remarkable phase of its life cycle.
Caterpillar Feeding Habits
Caterpillars are voracious eaters, and maintaining a consistent food supply is paramount when using a caterpillar to butterfly kit. They primarily feed on the host plant specified for their species, utilizing strong mandibles to chew through leaves. Ensure fresh leaves are always available, replacing any wilted or consumed foliage daily.
Different caterpillar species have preferences, so using the correct host plant is critical for their survival. Observe your caterpillars closely; a healthy caterpillar will exhibit consistent feeding behavior.
Avoid overcrowding the habitat with too much food, as uneaten leaves can promote mold growth. Gently mist the leaves to maintain freshness and provide a source of hydration for the caterpillars.
Consistent feeding is essential for optimal growth and a successful metamorphosis.
Caterpillar Molting (Ecdysis)
Caterpillars grow rapidly, but their exoskeleton doesn’t expand. To accommodate this growth, they undergo a process called molting, or ecdysis, shedding their skin several times throughout the larval stage. You’ll notice your caterpillar becoming inactive and appearing dull before a molt.
The caterpillar will then wriggle and shed its old skin, revealing a new, larger exoskeleton underneath. Do not interfere with this process; it’s crucial for their development.
After molting, the caterpillar will initially appear pale, but its coloration will return as the new exoskeleton hardens. They often consume the shed skin, regaining valuable nutrients.
Be patient during molting, as it can take several hours. Providing a secure and undisturbed environment is key to a successful molt;
Stage 3: The Pupa (Chrysalis)
Once the caterpillar reaches its full size, it enters the pupa stage, forming a chrysalis. The caterpillar will find a suitable spot, often hanging upside down, and shed its skin one final time, revealing the chrysalis underneath.
This protective shell may appear green, brown, or even have metallic markings, depending on the butterfly species. Avoid touching or disturbing the chrysalis, as this can damage the developing butterfly inside.
The chrysalis stage is a period of remarkable transformation, where the caterpillar’s body undergoes a complete reorganization. It’s a seemingly inactive phase, but incredible changes are happening within.
Maintain a stable environment during this stage, ensuring proper temperature and humidity for successful metamorphosis. Patience is key, as the duration of the pupa stage varies.
What Happens Inside the Chrysalis?
Within the seemingly still chrysalis, a breathtaking process unfolds. The caterpillar’s tissues are broken down and reorganized into the structures of a butterfly. This isn’t simply growth; it’s a complete metamorphosis, a radical transformation at a cellular level.
Specialized cells, present since the larval stage, become active, building wings, legs, antennae, and all the intricate parts of the adult butterfly. This complex process requires significant energy and a stable environment.
Do not attempt to open or interfere with the chrysalis, as this will disrupt the delicate development and likely result in a failed emergence. The transformation is a carefully orchestrated biological event.
The duration of this internal restructuring varies depending on the species and environmental conditions, but it’s a crucial period for the butterfly’s development.
Chrysalis Appearance and Duration
The chrysalis, or pupa, exhibits diverse appearances depending on the butterfly species. It can be smooth or textured, green, brown, or even adorned with metallic markings, often blending seamlessly with its surroundings for camouflage. Some resemble leaves or twigs, providing excellent protection.
Typically, the chrysalis hangs upside down, secured by a silk pad spun by the caterpillar. Avoid disturbing it during this vulnerable phase. The duration inside varies significantly.
Generally, this stage lasts from a few weeks to two months, but can be shorter or longer based on temperature and species. Maintain a consistent, appropriate temperature as fluctuations can impact development.
Observe the chrysalis daily for changes in color or transparency, which indicate the impending emergence of the adult butterfly. Patience is key during this fascinating stage!
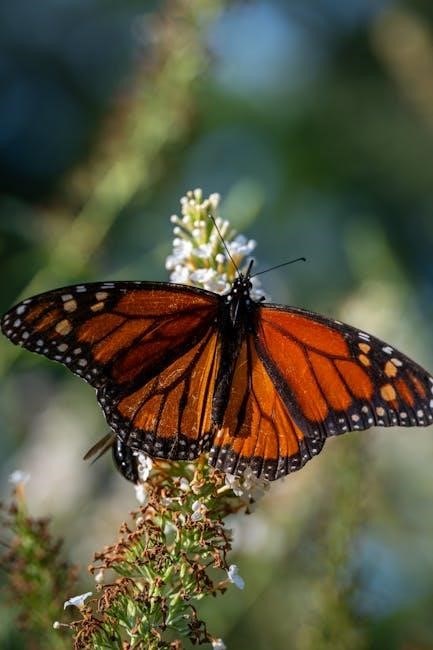
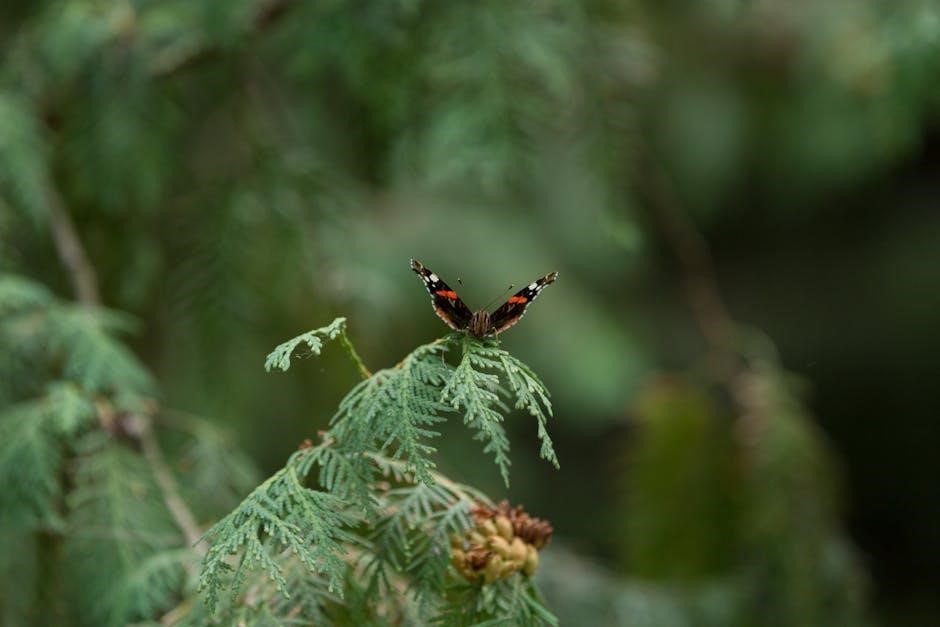
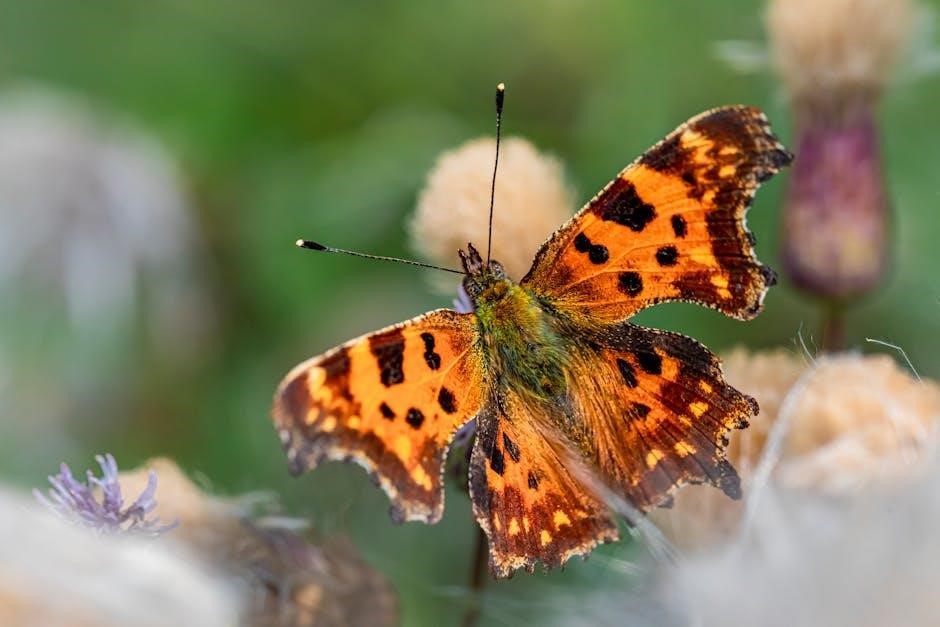
Stage 4: The Adult Butterfly
The final stage unveils the magnificent adult butterfly! Emergence, or eclosion, begins when the chrysalis becomes transparent, revealing the butterfly within. The butterfly then breaks free, a delicate process requiring patience and observation.
Initially, the wings are crumpled and wet. The butterfly pumps hemolymph (insect blood) into the wing veins, gradually expanding them to their full size and shape. Do not interfere with this process; it’s crucial for proper wing development.
This wing expansion can take several hours. Once dry and fully extended, the butterfly is ready for its first flight. Provide a nectar source, like a sugar-water solution, to nourish the newly emerged butterfly.
The adult’s primary roles are reproduction and continuing the life cycle. Observe its behavior before preparing for release.
Emergence from the Chrysalis
Witnessing emergence is a highlight of raising butterflies! As the butterfly nears readiness, the chrysalis will transition from opaque to translucent, allowing you to glimpse the developing wings inside. This signals the imminent arrival of the adult butterfly.
The process begins with the chrysalis splitting open, and the butterfly slowly pulls itself free. This can take anywhere from a few minutes to an hour, and it requires considerable effort from the insect.
Resist the urge to help! Interference can damage the delicate wings. Provide a stable environment and observe from a respectful distance. The butterfly will naturally work to extract itself.
Once fully emerged, the butterfly will hang upside down, preparing for the crucial wing-expansion phase.
Butterfly Wing Expansion
Following emergence, the butterfly’s wings appear crumpled and small. This is perfectly normal! The butterfly now pumps a fluid called hemolymph from its body into the veins of its wings, causing them to expand to their full size and shape.
This process is critical and can take several hours. Avoid disturbing the butterfly during this time, as any interruption could hinder proper wing development, resulting in deformities.
Ensure the habitat remains undisturbed and maintains appropriate temperature and humidity levels to support successful expansion. The butterfly will remain hanging, allowing gravity to assist in the unfolding process.
Once the wings are fully expanded and dry, the butterfly is ready for its first flight and eventual release into the wild, completing its incredible transformation!
Setting Up Your Caterpillar Kit
Carefully unpack your kit and assemble the habitat, ensuring a secure environment for your caterpillars’ growth and metamorphosis journey.
Prepare the habitat with fresh food and appropriate bedding, following the specific instructions included with your chosen kit for optimal results.
Choosing the Right Location
Selecting the ideal location for your caterpillar habitat is crucial for their healthy development and successful metamorphosis. Avoid direct sunlight, as excessive heat can be detrimental to the caterpillars and potentially harm the developing chrysalis.
A spot with indirect, bright light is preferred, mimicking their natural environment. Ensure the habitat is placed on a stable, level surface, away from drafts or significant temperature fluctuations.
Consider a location that is easily accessible for daily observation and care, but also protected from curious pets or small children who might disturb the caterpillars.
A quiet corner of a room, away from high-traffic areas, is often ideal. Maintaining a consistent temperature between 65-80°F (18-27°C) is recommended for most butterfly species, so avoid placing the habitat near vents or radiators. Remember, a stable and secure environment will contribute significantly to the success of your butterfly-raising adventure!
Maintaining Optimal Temperature and Humidity
Consistent temperature and humidity are vital for successful butterfly development. Most caterpillars thrive in a temperature range of 65-80°F (18-27°C). Monitor the temperature regularly, and adjust the location if needed to avoid overheating or chilling.
Humidity levels should be maintained around 60-70%. You can increase humidity by lightly misting the inside of the habitat with water, ensuring not to directly spray the caterpillars.
Avoid creating excessive moisture, which can lead to mold growth. Proper ventilation is also important to prevent stagnant air.
A hygrometer can be used to accurately measure humidity levels. Observe your caterpillars for signs of stress, such as sluggishness or dehydration, which may indicate improper temperature or humidity. Maintaining these conditions will support healthy growth and a successful metamorphosis into a beautiful butterfly!
Kit Contents Checklist
Before beginning your butterfly-raising adventure, verify all components are present. A standard kit typically includes a pop-up habitat, designed to provide a secure and ventilated environment for the caterpillars.
You should also find a supply of caterpillar food, specifically formulated to meet their nutritional needs during the larval stage. This is often in the form of a powder or gel.
Instructions are crucial, detailing each stage of the process and offering helpful tips. Some kits include a small paintbrush for gentle cleaning or food placement.
Occasionally, a magnifying glass is included for closer observation of the caterpillars. Finally, ensure the kit contains a chrysalis clip or similar support for the pupa stage. Carefully check against the packaging list to confirm everything is accounted for before you start!
Caring for Your Caterpillars
Consistent care is vital for healthy caterpillars. Provide fresh food daily, maintain a clean habitat, and observe for any signs of distress or unusual behavior.
Feeding Your Caterpillars
Providing the correct diet is crucial for caterpillar growth and successful metamorphosis. Most kits include specific host plant leaves, which are the caterpillars’ natural food source – typically milkweed for Monarchs, for example.
Ensure a constant supply of fresh leaves, replacing them at least once daily, or more often if they become wilted or consumed. Place the leaves in a small container filled with water, or a damp paper towel, to maintain freshness. Avoid overcrowding the habitat with too much foliage at once, as this can promote mold growth.
Caterpillars are voracious eaters, so don’t be alarmed by how much they consume! Observe their feeding habits to gauge how quickly they are growing. If your kit doesn’t include fresh leaves, research the specific host plant required by your caterpillar species and obtain it from a reputable source. Never offer caterpillars food other than their designated host plant.
Cleaning the Habitat
Maintaining a clean habitat is vital for caterpillar health and preventing the spread of disease. Daily spot cleaning is essential; remove any caterpillar frass (droppings) and uneaten, decaying leaves promptly. Use a soft brush or paper towel to gently wipe down the sides of the container, avoiding any disturbance to the caterpillars.
A more thorough cleaning should be performed every few days, or as needed. Carefully remove the caterpillars to a temporary container while you disinfect the habitat with a mild solution of diluted bleach (1 part bleach to 9 parts water) or a commercially available reptile/insect habitat cleaner. Rinse thoroughly with water and allow to dry completely before returning the caterpillars.
Avoid using harsh chemicals or scented cleaners, as these can be harmful. Proper hygiene minimizes the risk of bacterial or fungal growth, ensuring a healthy environment for your developing butterflies.
Recognizing a Healthy Caterpillar
Observing your caterpillars daily allows you to quickly identify any potential health issues. A healthy caterpillar will be actively feeding, growing visibly larger with each molt, and displaying vibrant coloration appropriate for its species. Its movements should be purposeful and coordinated, not sluggish or erratic.
Look for a plump, firm body; a shriveled or deflated appearance can indicate dehydration or illness. Ensure the caterpillar is shedding its skin properly during molting, with clean breaks and no retained skin fragments. Normal frass (droppings) should be dark and pellet-like.
Be alert for signs of disease, such as lethargy, loss of appetite, unusual discoloration, or abnormal behavior. Promptly address any concerns to maximize the chances of successful metamorphosis.
Dealing with Common Issues
Unexpected challenges can arise during rearing. Addressing caterpillar diseases, parasitism, or mold promptly is crucial for a successful butterfly emergence and healthy development.
Caterpillar Diseases
Recognizing and addressing caterpillar diseases is vital for a successful metamorphosis. Several pathogens can affect caterpillars, often appearing as discoloration, lethargy, or unusual behavior. One common issue is Nuclear Polyhedrosis Virus (NPV), presenting as a white, granular coating on the caterpillar’s body, leading to eventual liquefaction.
Bacterial and fungal infections can also occur, manifesting as dark spots or fuzzy growths. Maintaining a clean habitat is paramount in prevention; promptly remove any diseased caterpillars to prevent spread. Disinfecting the enclosure with a mild bleach solution (thoroughly rinsed afterward) can help control pathogens.
Avoid overcrowding, as this increases stress and susceptibility to illness. If you observe signs of disease, isolate the affected caterpillar immediately. Unfortunately, there’s often little that can be done to cure a caterpillar once infected, but preventative measures are key to a thriving colony. Careful observation and hygiene are your best defenses.
Parasitism
Parasitism poses a significant threat to caterpillars in kits, often taking the form of tiny wasp larvae or tachinid fly eggs laid on the caterpillar’s skin. These parasites develop inside the caterpillar, eventually emerging and killing their host. Look for small, white or yellowish cocoons attached to the caterpillar’s body – a clear sign of parasitism.
Unfortunately, there’s no effective treatment once a caterpillar is parasitized. It’s crucial to remove any parasitized caterpillars immediately to prevent the parasites from spreading to healthy ones. Maintaining a secure enclosure with fine mesh netting can help prevent adult parasitic flies and wasps from laying eggs.
Careful inspection of host plants before introducing them to the habitat is also recommended. While unpleasant, parasitism is a natural part of the ecosystem, but in a controlled kit environment, proactive prevention and removal are essential for maximizing the chances of successful butterfly emergence.
Mold and Bacteria Growth
Mold and bacterial growth are common issues within caterpillar habitats, thriving in the humid environment created by fresh leaves and caterpillar waste. These can quickly become problematic, potentially harming or even killing your caterpillars. Regularly cleaning the habitat is paramount; remove old frass (caterpillar droppings) and uneaten leaves daily to minimize buildup.
Ensure adequate ventilation within the enclosure to reduce humidity. A slightly drier environment discourages mold growth. If you notice mold appearing, gently remove it with a cotton swab dipped in a diluted bleach solution (ensure it’s thoroughly dried before reintroducing caterpillars).
Avoid overcrowding, as this exacerbates humidity and waste accumulation. Using fresh, clean host plant leaves and maintaining good hygiene are the best preventative measures. A healthy caterpillar is more resistant to infections, so proper feeding and care are vital.
Releasing Your Butterfly
Releasing your butterfly is a rewarding finale! Choose a warm, sunny day and a location with ample nectar sources for sustenance and continued thriving.
When is the Right Time to Release?
Determining the optimal release time is crucial for your butterfly’s successful transition to life in the wild. Ideally, you should release your butterfly on a warm, sunny day with temperatures consistently above 65°F (18°C). Avoid releasing during periods of rain, strong winds, or extreme temperatures, as these conditions can hinder the butterfly’s ability to fly and find food.
Observe the butterfly closely; a key indicator is when it fully expands its wings and allows them to dry completely. It will often spend several hours pumping fluids into its wings to achieve full size and strength. Once the wings are firm and the butterfly is actively fluttering and attempting to fly within the habitat, it’s generally a good sign it’s ready for release. Releasing too early, before the wings are fully developed, can leave the butterfly vulnerable.
Morning releases are often preferred, giving the butterfly the entire day to acclimate and find resources. Avoid releasing late in the afternoon or evening, as it may struggle to find shelter before nightfall.
Choosing a Release Location
Selecting a suitable release location is vital for the butterfly’s well-being. Opt for an outdoor area with abundant nectar-rich flowers, providing a readily available food source. A garden, meadow, or park with diverse flowering plants is ideal. Ensure the location is free from pesticides and other harmful chemicals that could endanger the butterfly.
Consider the butterfly’s species and its natural habitat when choosing a release site. If possible, release it near similar vegetation where it would naturally thrive. Avoid releasing butterflies in enclosed spaces or areas with heavy foot traffic. A sheltered spot, protected from strong winds, is also beneficial.
Prioritize locations away from predators like birds and lizards. A slightly overgrown area with shrubs or trees can offer some protection. Remember, the goal is to give the butterfly the best possible chance to flourish in its new environment.
Post-Release Care (Observation)
Following the release, observe the butterfly from a respectful distance. Initially, it may rest with wings fully expanded, pumping fluids to gain strength and rigidity. This process can take several hours, so avoid disturbing it during this crucial time. Note its flight pattern – a healthy butterfly will fly steadily and purposefully.
Look for signs of feeding, such as the butterfly probing flowers with its proboscis. Observing its behavior will confirm it’s adjusting well to its new environment. If the butterfly struggles to fly or appears weak, it may have underlying issues.
Avoid attempting to recapture a released butterfly. Allow it to acclimate naturally. Your role is now to appreciate the beauty of nature and the successful completion of the butterfly’s life cycle. Enjoy the moment!